Macdon 4000 Mower Conditioner User Manual
Browse online or download User Manual for Gardening equipment Macdon 4000 Mower Conditioner. MacDon 4000 Mower Conditioner User Manual
- Page / 73
- Table of contents
- BOOKMARKS
- INTRODUCTION 1
- TABLE OF CONTENTS 2
- SERIAL NUMBER LOCATION 4
- Make sure 8
- SPECIFICATIONS 10
- TORQUE SPECIFICATIONS 11
- OPERATION 13
- MAINTENANCE/SERVICE 38
- MAINTENANCE /SERVICE 54
- MAINTENANCE RECORD 60
- TROUBLE SHOOTING 61
- ATTACHMENTS 65
- UNLOADING & ASSEMBLY 66
- Model 4000 Mower Conditioner 73
- Pre-Delivery Checklist 73
Summary of Contents
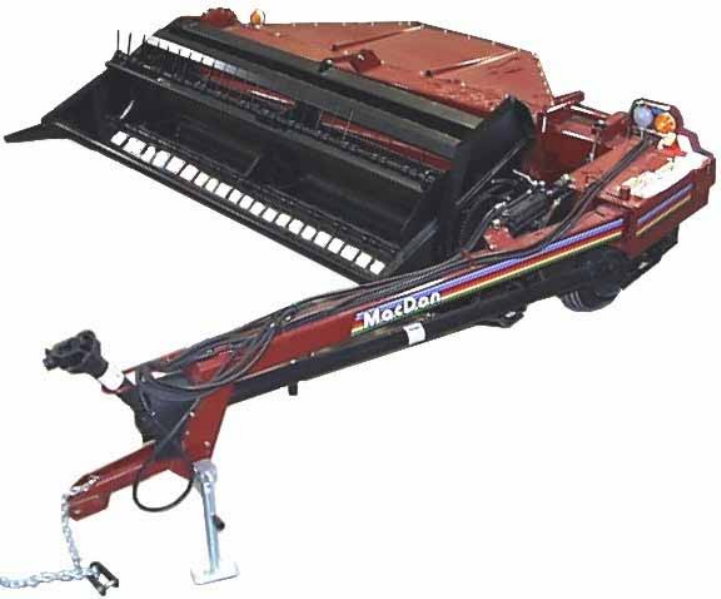
1INTRODUCTIONYour new MacDon Model 4000 Mower Conditioner is designed to cut, condition and lay in windrows, a widevariety of grasses and hay crops.Us
10SPECIFICATIONSCONDITIONER ROLLS 9 FT. MOWER CONDITIONERDrive Type Gear driven through telescoping u-jointsRoll Type Helical intermeshing fabric rein
11TORQUE SPECIFICATIONSCHECKING BOLT TORQUEThe tables shown below give correct torque values for various bolts and capscrews. Tighten all bolts to the
12TORQUE SPECIFICATIONSTIGHTENING HYDRAULIC O-RING FITTINGS*1. Inspect O-ring and seat for dirt or obviousdefects.2. On angle fittings, back the lock
13OPERATIONYOUR RESPONSIBILITIES AS AN OWNER/OPERATORCAUTION:1. It is your responsibility to read andunderstand this manual completely beforeoperating
14STANDARD DRAWBAR SPECIFICATIONSOPERATIONPREPARING THE TRACTOR1. Select proper tractor size. The minimumpower required is 35 hp (26 kw). Also,minimum
15HITCH CONFIGURATION FOR TRACTORSWITH CLEVIS TYPE DRAWBARAOPERATIONPREPARING THE MOWER CONDITIONER1. Use correct hitch type:For tractors with clevis
16OPERATIONATTACHING MOWER CONDITIONER TO TRACTORCAUTION: Shut off tractor, engageparking brake and remove keybefore working around hitch.CAUTION: Nev
17OPERATIONDETACHING MOWER CONDITIONER FROM TRACTORCAUTION: To prevent accidentalmovement of tractor, shut offengine, engage parking brake, andremove
18OPERATIONBREAK-IN PERIOD1. After attaching mower conditioner to tractor forthe first time, operate the machine slowly for 5minutes, watching and lis
19OPERATIONPRE-STARTING CHECKSDo the following at the start of each operatingseason:CAUTION:1. Review the Operator’s Manual to refreshyour memory on s
2TABLE OF CONTENTSPAGEINTRODUCTION ...
20OPERATIONPRE-STARTING CHECKSDo the following each day before start-up:CAUTION:1. Clear the area of other persons, pets etc.Keep children away from m
21OPERATIONOPERATE CORRECTLYCAUTION:1. Follow all safety and operational instructions given in your tractor Operator’s Manual. If you donot have a tra
22OPERATIONLIFT CYLINDER STOP(RAISING AND LOWERING MOWER CONDITIONER)WARNING: To avoid bodily injury ordeath from fall of raised machine,always engage
23OPERATIONPOSITIONING THE HITCHThe mower conditioner hitch can be movedbetween transport position (A) and field position(B) with the hitch shift cyli
24OPERATIONENGAGING THE PTODANGER: Be sure all bystanders areclear of the machine beforeengaging the PTO. Never leavetractor seat with the PTO engaged
25OPERATIONOPERATING VARIABLESThe eight variables covered here will affect the operation of your mower conditioner. You will quickly becomeadept at ad
26OPERATIONOPERATING VARIABLES (continued)2. REEL SPEEDFor best feeding of the crop into theconditioning rolls, reel speed should be justfaster than g
27OPERATIONOPERATING VARIABLES (continued)3. REEL POSITIONReel position has been found to be a critical factor in achieving good results in adverse co
28OPERATIONOPERATING VARIABLES (continued)3. REEL POSITION (continued)After adjusting reel position:a. Check that the reel rotates freely. Tines must
29OPERATIONOPERATING VARIABLES (continued)5. CUTTERBAR ANGLECutterbar angle can be varied from 6° to 12° below horizontal. Choose an angle that maximi
3TABLE OF CONTENTSPAGEMAINTENANCE/SERVICEService Procedures ...
30OPERATIONOPERATING VARIABLES (continued)6. HEADER FLOTATIONHeader flotation springs are normally set so 70 lbs.force (311 N) is required to lift eac
31OPERATIONOPERATING VARIABLES (continued)7. ROLL GAPWARNING: To avoid bodily injury ordeath from unexpected start-up orfall of raised machine; stop e
32OPERATIONOPERATING VARIABLES (continued)8. FORMING SHIELDSWARNING: Keep hands and feet away from discharge opening. Keep everyone severalhundred fee
33FEED PAN EXTENSIONS FOR LIGHT CROPOPERATIONOPERATING VARIABLES8. FORMING SHIELDS (continued)Feed Pan ExtensionsExtensions should be installed in wor
34OPERATIONHAYING TIPS (continued)2. CLIMATE AND TOPOGRAPHY a. Try to have as much hay cut as possible by midday, when drying conditions are best. b.
35OPERATIONUNPLUGGING THE MOWER CONDITIONERWARNING: Stop tractor engine andremove key before removingplugged material from mowerconditioner. A child o
36OPERATIONSHUT-DOWN PROCEDURECAUTION: Before leaving the tractor seat for any reason:1. Park on level ground if possible.2. Lower the mower condition
37OPERATIONSTORAGE PROCEDURE:Do the following at the end of each operatingseason:CAUTION:1. Clean the mower conditioner thoroughly.Never use gasoline,
38MAINTENANCE/SERVICESERVICE PROCEDURESCAUTION: To avoid personal injury,before servicing mower conditioneror opening drive covers:1. Fully lower the
39MAINTENANCE/SERVICERECOMMENDED LUBRICANTSGREASEUse SAE Multi-Purpose High Temperature Greasewith Extreme Pressure (EP) Performance andcontaining at
4SERIAL NUMBER LOCATIONRecord the serial number in the space provided.Mower Conditioner: Serial number pl
40MAINTENANCE/SERVICEGREASING THE MOWER CONDITIONERSee "Recommended Lubricants" in this section forrecommended greases.The following greasin
41MAINTENANCE/SERVICEGREASING THE MOWER CONDITIONER10 Hours or Daily (continued)3. Upper & Lower Roll Universal Shafts(E) & (F) - three fittin
42MAINTENANCE/SERVICEGREASING THE MOWER CONDITIONER (continued)50 Hours:1. Roll Shaft Bearings (A) & (B) - four fittings2. Left and Right Saddle B
43MAINTENANCE/SERVICEGREASING THE MOWER CONDITIONER (continued)100 Hours or Annually1. Reel Shaft Bearing (A) - one fitting2. Wheel Hub Bearings (D) -
44MAINTENANCE/SERVICELINKAGE BALL JOINTSApply SAE 30 or equivalent lightweight oil to theball joints every 50 hours.NOTE: Do not oil ball joints if op
45MAINTENANCE/SERVICEHYDRAULICSCheck hydraulic hoses daily for signs of leaks.WARNING: Avoid high-pressurefluids. Escaping fluid can penetratethe skin
46MAINTENANCE/SERVICEMAIN DRIVEMain Gearbox LubricantThe main gearbox consists of two separate cases.Check both lubricant levels before first operatio
47MAINTENANCE/SERVICEMAIN DRIVE (continued)Over-running/Slip ClutchThe clutch is designed to protect the machineagainst damage from overloading.It is
48MAINTENANCE/SERVICEKNIFE AND KNIFE DRIVEWARNING: Keep hands clear of thearea between guards and knife at alltimes.CAUTION: Wear heavy gloves whenwor
49MAINTENANCE/SERVICEKNIFE AND KNIFE DRIVE (continued)To Remove KnifeWARNING: Always stand to rear ofknife during removal to reduce riskof injury from
5SAFETYSAFETY ALERT SYMBOLThis safety alert symbol indicates important safety messages in this manual andon safety signs on the mower conditioner.This
50MAINTENANCE/SERVICEKNIFE AND KNIFE DRIVE (continued)GuardsCheck daily that guards are aligned to obtainproper shear cut between knife section and gu
51MAINTENANCE/SERVICEKNIFE AND KNIFE DRIVE (continued)Knife Drive Belt TensionIMPORTANT: To prolong belt and drive life, do notover-tighten belt.To ad
52MAINTENANCE/SERVICEKNIFE AND KNIFE DRIVE (continued)Wobble Box Mounting BoltsCheck four wobble box mounting bolts (B) torqueafter the first 10 hours
53MAINTENANCE/SERVICEREEL AND REEL DRIVEReel Drive Belt TensionIMPORTANT: To prolong belt and drive life, do notover-tighten belt. Operate at minimum
54MAINTENANCE /SERVICEREEL AND REEL DRIVE (continued)Reel Drive Chain LubricationLubricate chain daily with lightweight oil (SAE 30).Apply oil to uppe
55ROLL TIMING (RUBBER ROLLS SHOWN)MAINTENANCE/SERVICEROLL TIMINGFor proper conditioning, the rolls must be timedwith the rubber lug (or steel bar) on
56MAINTENANCE/SERVICEWHEELS AND TIRESWheel BoltsCheck and tighten wheel bolts after the first 10hours of operation and every 100 hours thereafter.When
57MAINTENANCE/SERVICEWHEELS AND TIRES (continued)Tire InflationCheck tire pressure daily. Maintain pressuresrecommended in Specifications section.WARN
58MAINTENANCE/SERVICEMAINTENANCE SCHEDULEThe following maintenance schedule is a listing ofperiodic maintenance procedures, organized byservice interv
59MAINTENANCE/SERVICEMAINTENANCE SCHEDULEAT FIRST USE: See "Preparing the Mower Conditioner" and "Break-In Period" in Operation se
6SAFETYSAFETY SIGNS• The safety signs reproduced below appear on the windrower at the locations listed.• Keep safety signs clean and legible at all
60MAINTENANCE RECORDMower Conditioner Serial No.See Maintenance/Service section for details of each procedure. Copy this page to continue record.ACTIO
61TROUBLE SHOOTINGSYMPTOM PROBLEM SOLUTION REF.Excessive breakage ofknife sections orguards.Cutting height too low instony conditions.Raise cutting he
62TROUBLE SHOOTINGSYMPTOM PROBLEM SOLUTION REF.Ragged or unevencutting of crop.(continued)Bent or misalignedguards causing poorshearing action.Align g
63TROUBLE SHOOTINGSYMPTOM PROBLEM SOLUTION REF.Leaving small strip offlattened, uncutmaterial.Ground speed too fast.Crowding of the uncutmaterial.Slow
64TROUBLE SHOOTINGSYMPTOM PROBLEM SOLUTION REF.Leaves damaged,crushed or stripped offstems.Roll gap too small.Rolls improperly timed.Increase roll gap
65ATTACHMENTSThe following attachments are available from your Dealer:FOUR OR SIX BAT REELWholeGoods order number: B2028A complete bat assembly can be
66UNLOADING & ASSEMBLYPREPARE TO UNLOADCAUTION: To avoid injury to bystandersfrom being struck by machinery, do notallow persons to stand in unloa
67UNLOADING & ASSEMBLYUNLOADING MOWER CONDITIONER:LIFTING AT 2 X 4NOTE: Use these instructions if lifting vehicle doesnot provide adequate lift he
68UNLOADING & ASSEMBLYLOWER MOWER CONDITIONER TO GROUND1. Drive lifting vehicle to approach mowerconditioner from its "underside".Attach
69UNLOADING & ASSEMBLYINSTALL HITCH AND DRIVELINENOTE: Hitch may be lifted at hose loops (A) forpositioning.1. Position hitch so it is resting par
7SAFETYGENERAL SAFETYThe following are general farmsafety precautions that should bepart of your operating procedure forall types of machinery.1. Prot
70UNLOADING & ASSEMBLYINSTALL HITCH SHIFT CYLINDER1. Move hitch to transport position.2. Install hydraulic cylinder with rod end atposition (A) an
71INDEXAPAGEAssembly...68Attaching the Mower Conditioner...16Attachments ...
72INDEXRPAGERaising and Lowering the Machine ...22Raking and Tedding...34Reel Bats - Additional...
Model 4000 Mower ConditionerPre-Delivery ChecklistPerform these checks and adjustments prior to delivery to your customer. See the Operator’s Manual f
8SAFETYGENERAL SAFETY (continued)6. Wear close-fitting clothing and cover longhair. Never wear dangling items such asscarves or bracelets.7. Keep hand
9SPECIFICATIONSDIMENSIONS 9 FT. MOWER CONDITIONEROverall Width:Transport Position 147.5 in. (3750 mm)Field Position 167.0 in. (4243 mm)Overall Length:
Related products and manuals for Gardening equipment Macdon 4000 Mower Conditioner
 (79 pages)
© 2020, manymanuals.com. All rights reserved. | 3.735 s |
 Manymanuals.com
 Manymanuals.de
 Manymanuals.fr
 Manymanuals.it
 Manymanuals.pl
 Manymanuals.cz
 Manymanuals.es
 Manymanuals-pt.com
Comments to this Manuals